Just letting you know I have merged this blog with my main website now... so please visit us there for all the information contained here and for new updates!
www.kerstenskitchen.com.au
Saturday 29 June 2013
Wednesday 26 June 2013
Cooking Class - Grain Free Christmas Baking
Celebrate this Christmas with a beautiful grain free meal
We will explore how to make some traditional Christmas foods grain free
DATE: Saturday 16 November 2013
TIME: 10.30am - 1.30pm
LOCATION: Peakhurst, Sydney
COST: $90
Let's make a delicious grain free Christmas dinner:
Chicken stuffed with grain free cranberry herb stuffing (we will make the bread to use)
Steamed Christmas puddings served with coconut custard
Gingerbread almond cookies
Trifle with a fermented twist
Honey Marshmallows
At the end of class we will share our Christmas lunch!
Everything will be free from gluten and grains. We will be using nuts and eggs in this class. This class is not suitable for those following RPAH Elimination and Failsafe diet. We will be using the Thermomix to make our goodies.
Places are limited so please email now to confirm your place kerstenskitchen@bigpond.com
Labels:
Christmas,
cooking classes,
GAPS,
gluten free,
grain free,
Paleo,
Thermomix
Wednesday 12 June 2013
Cooking Class in Sydney Term 3, 2013
Grain free cooking
We have a one day class coming up in Sydney learning to cook without grains
Date:
Saturday 7 September 2013Time:
10-3pmCost:
$150Location:
Peakhurst, SydneyWe will be making savoury main meals, as well as sweet treats and desserts.
Learn how to
create main meals using healing ingredients, including grain free lasagne
make broth and basic soups
bake with seeds and nuts
bake with coconut flour and oil
You will also get to sample other delicious goodies
Please email me at kerstenskitchen@bigpond.com if you would like to attend and I will send you all the details.
Thursday 6 June 2013
Newcastle Cooking Classes - August 2013
Failsafe to Healing
Date: 17 August 2013
Time: 12-4pm
Date: 18 August 2013
Time: 10-1pm
Cost: $300
Location: Wallsend
We will be cooking in the lovely Natasha's kitchen so places are limited.
The classes will cover the following:
Transitioning from failsafe to grain free healing diet
Transition recipes - snacks and mains
Basic fermented veg and drinks
How to make broth and basic soups
Grain free meals including lasagne
Coconut oil and flour baking
Transitioning from failsafe to grain free healing diet
Transition recipes - snacks and mains
Basic fermented veg and drinks
How to make broth and basic soups
Grain free meals including lasagne
Coconut oil and flour baking
Please email me at kerstenskitchen@bigpond.com if you would like to attend and I will send you all the details.
Melbourne Cooking Class July 2013
Gluten Free and Grain Free Baking
DATE: Sat 20th July 2013
TIME: 11 - 4pm
COST: $150
WHERE: Narre Warren North
We are cooking in the lovely Joanne's Kitchen so places are limited. She has kindly offered up her place for me to stay so I have been able to reduce the cost of the class significantly.
We will be making (everything gluten and nut free)
Failsafe:
breads using different gluten free grains
wraps
pear muffins
carob brownies
Grain free and refined sugar free (using coconut flour):
chocolate coconut cupcakes
crepes
banana bread
We will also sample some other grain free delights including coconut yoghurt... the rest will be a surprise
Please email me for details if you would like to join us... kerstenskitchen@bigpond.com
Thursday 30 May 2013
muesli
add that crunch back in...
Ingredients
1C Buckwheat Flakes
1C Macadamia Nuts
1C Shredded Coconut
1C Coconut Flakes
1/2C Sunflower seeds
1/2C Goji berries
1/2C honey
1/2C coconut oil
Method
Roughly chop macadamia nuts (in Thermomix - pulse 2-3 times)
Put all dry ingredients into a large bowl and add the nuts
Melt honey and coconut oil
Pour into the dry ingredients and combine with a wooden spoon until everything is coated
Place in a lined baking dish and bake 180 degrees for approx. 15-20 minutes until golden
Stirring occasionally
Allow to cool in the dish, then crumble up using a wooden spoon
Store in an airtight container in the pantry
Perfect on top of your coconut yoghurt for a filling breakfast or snack on the go...
Friday 3 May 2013
Passionfruit Curd
Perfect on pancakes or with coconut yoghurt
Ingredients
2 eggs
80g honey
3 passionfruits
60g ghee
Method
Insert the butterfly into Thermomix bowl
Add all ingredients in the bowl
Cook 8 minutes, 80 degrees, speed 3
Pour into a container and allow to cool. Store in fridge
Labels:
curd,
GAPS,
grain free,
Paleo,
passionfruit curd,
recipe,
spread,
Thermomix
Coconut Yoghurt
Smooth and Creamy Yoghurt, no dairy!
The gelatin in this recipe does two things: it sets the yoghurt and it gives you a smooth and creamy mouth feel
Ingredients

800ml coconut milk
(I use AYAM brand: 3 x 270ml tins
or 2 x 400ml tins)
2t honey
1 1/2t gelatin*
1/32t yoghurt starter**
1/32t probiotic culture**
Method

Add coconut milk, honey and gelatin to Thermomix bowl
Heat until gelatin dissolves, 5 minutes, 80 degrees, speed 3
Allow to cool until around 37 degrees (about 5 minutes)
Add yoghurt starter and probiotic, mix 30 seconds, speed 3
Pour into containers and leave in yoghurt machine for 24 hours
When done, it will still be liquid and will have separated. Shake well, then refridgerate for 8 hours or until set.
When set it will look firm. All it needs is a quick stir with a spoon until smooth. Now you can use as is, or flavour with homemade jam or fruit puree. My favourite combination is with passionfruit curd.
*Gelatin - make sure you use a good quality gelatin
You can vary the amount of gelatin to vary the thickness of the yoghurt
pouring yoghurt - 1t
normal thickness - 1.5t
thick greek style - 2t
I find 1.5t enough. Coconut sets when cold, so you will find the yoghurt will firm up just from being cold.
**Yoghurt Starter
I use the dairy free culture from www.greenlivingaustralia.com.au as well as their probiotic. You can use a probiotic like Polybac 8 too (or whatever you have in your fridge).
Note: To measure such small amounts, grab a set of tiny measuring spoons from Green Living Australia when purchasing your cultures
Perfect to use with Squeeze 'ums... fill up the small 80ml for school lunchboxes or 200ml for a snack for mum
Thursday 25 April 2013
Cooking Classes for Term 2 2013 - Failsafe to Healing
Cooking classes for Term 2, 2013
Failsafe to Healing (set of 3 classes)
Cost:
All three classes $270
One class $120
Time: 10am - 1.30pm
Dates: Saturdays - 18th May, 25th May, 1 June 2013
Location: Kersten's Kitchen: Peakhurst, Sydney
Day one - 18th May
Transitioning from failsafe to grain free healing diet
Transition recipes - snacks and mains
Day two - 25th May
Basic fermented veg and drinks
How to make broth and basic soups
Grain free meals including lasagne
Day three - 1 June
Grain free snacks and dessertsCoconut oil and flour baking
All food will be free from gluten and dairy (except ghee) and nuts. We will be using coconut, ghee, some gluten free seeds including buckwheat, millet, tapioca and eggs. We will go through how to use mod salicylates initially, but will use all sorts of fruit and veg in the classes.
We will be using the Thermomix for many of our creations.
Full payment will be required to secure your spot. Places are limited.
Please email me kerstenskitchen@bigpond.com and I will send you payment and confirmation details
Please email me kerstenskitchen@bigpond.com and I will send you payment and confirmation details
Saturday 23 February 2013
Fine Almond Meal in Thermomix
The impossible... right???
Well I have read all sorts of hints and tips on how to get your almond meal fine in the Thermomix... none got it very fine. Ok for some recipes, but terrible for cookies.
After some mouldy activated nuts, I decided I had better keep them in the freezer.
I wanted to make some Almond Bread and just chucked in some almonds and pulverised for 20sec speed 9... and low and behold, the meal was nice and fine!
The problem with nuts is they are full of oil and as you grind them, the heat releases the oils... hence a few seconds for a coarse flour, a bit too long and you have nut butter. When the nuts are cold, you get a bit longer before the oils are released so the Thermomix can make a finer meal.
I am using Almonds with the skin on, if you used blanched nuts, you would no doubt get an even finer result.
Very pleased I don't need to purchase expensive almond meal any more to make my cookies!
So the secret is simple
FREEZE YOUR NUTS BEFORE YOU GRIND
Labels:
almond,
fine almond meal,
GAPS,
grain free,
Paleo,
Technique,
Thermomix
Sunday 17 February 2013
Pumpkin Soup
Delicious and Creamy... eat as is, or with some shredded chicken
This soup is light but filling as it has lots of healing fats and broth...
Ingredients:
1/4C duck fat
1/4C ghee
1/2 butternut pumpkin
2C broth
Method:
Peel and chop pumpkin and put in a pot with the fat and ghee
Stir on medium heat as the fats melt
Once melted, simmer for 10 minutes
Add the broth and cook until pumpkin is soft
Puree in the Thermomix for 20 seconds Speed 8
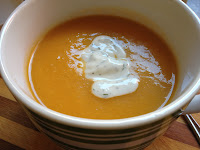
To Serve,
simply drink from a cup with a dollop of yoghurt or top with shredded chicken, some crispy kale and toasted nuts
Crispy Kale - toss some finely sliced kale in coconut oil and fry until crispy
Toasted Nuts - chop some walnuts and stir over medium heat until golden and crunchy
Wednesday 13 February 2013
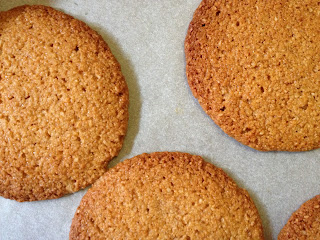
Gingerbread cookies
Chewy spicy and lovely...
Ingredients:
1 1/2C fine almond meal1/2C honey
3T coconut oil
1T ghee
1/4t mixed spice
1/4t ground ginger
1/4t salt
1/4t bicarb soda
Method:
Warm honey, oil and ghee in a small potCombine all dry ingredients in a large mixing bowl
Add melted liquids and stir until combined with a wooden spoon
Roll into small balls and place on a lined baking tray with space between to allow for spreading (they double in size)
Press flat with either your hand or a damp cup
Bake 180 degrees for 15 minutes until lightly golden... watch carefully as the honey cooks quickly
Cool on the trays (they will harden on cooling)
If you store in the pantry, they will remain chewy... If in the freezer, they are super crunchy
 |
| To flatten cookies, use a flat measuring cup... dip in water and press gently but firmly on cookie ball... carefully lift off cup... then repeat for remaining cookies |
Labels:
almond,
cookie,
GAPS,
gingerbread cookies,
grain free,
Paleo,
recipe
Sunday 10 February 2013
White Sauce
Creamy Cauliflower...
Use this white sauce as a soup or for lasagne or just a dollop on top of some baked salmon...
Ingredients:
half a head of cauliflower
3 heaped T duck fat
3 heaped T ghee
1C broth (lamb or chicken)
Method:
Cut off all the fibrous parts of the cauliflower
Place the florets into your pot with the fat and ghee
Cook over medium heat, stirring as the fat melts... combine it all together
Reduce to a low heat, place lid on pot and cook for 10-15 minutes... stirring occasionally
Add the broth once the cauliflower has started to soften
Replace the lid and cook until very soft
Pour mix into your Thermomix, blend 20 seconds speed 8
Add salt and pepper to taste, combine10 seconds speed 4
This is very thick, just right for a white sauce for lasagne or to dollop... If you want to use it for a thinner soup, add another cup of broth.
Labels:
cauliflower soup,
GAPS,
grain free,
lasagne,
Paleo,
recipe,
soup,
white sauce
Sunflower Seed Cookies
A nut free lunch box filler...
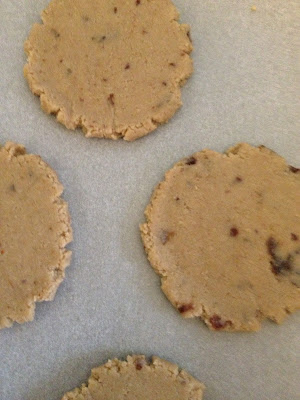 |
| Cookies before baking... |
Ingredients:
1C sunflower seeds30g ghee
1T raisins
1t cinnamon
Method:
Pulverise sunflower seeds in your Thermomix, 10sec speed 9Add remaining ingredients and process 15sec speed 4
Roll into balls and flatten with your hand or the back of a flat measuring cup
**If the cup sticks to the cookie, cover the rolled ball with baking paper then press lightly with the cup... remove paper and repeat with remaining cookies
Bake 180 degrees for 10 minutes until lightly golden
Cool on tray
Store in freezer for a crisp snack... can store in the pantry as well
Almond Bread
Lovely and light... satisfies my craving for cake and bread
This makes a very small quantity and a thin slice. I use a small dish 18x12cm. It works well doubled.
Ingredients:
1/2C activated almonds1T coconut flour
1T honey
1/4t bicarb soda
2 eggs
Method:
Using your Thermomix, Process almonds until they are almost a paste 30sec speed 8Add honey, 10sec speed 4
Add eggs, 20sec speed 4
Add flour, 10sec speed 4
Pour into lined baking dish (don't be alarmed it should be runny)
Bake 180 degrees for 20 minutes until golden
Lift out of tin and cool on rack
Slice and freeze in portions if desired.
Labels:
almond,
almond bread,
bread,
GAPS,
grain free,
Paleo,
recipe,
rice free,
Thermomix
Friday 8 February 2013
Chocolate Avocado Mousse
Cacao plus Avocado equals amazing
Who would have thought these two ingredients together could be so delicious and flexible... You can enjoy this as a mousse, as an icecream, as an icing on cupcakes, as a slice, or just with a spoon!
Ingredients:
2 avocadoes70g coconut oil
60g raw cacao
2-3 heaped T honey (to taste)
1/2 vanilla bean (seeds only)
Method:
Put all ingredients in Thermomix and combine 20sec speed 5Taste and add more honey if you like it sweeter
As a mousse:
Put in a container and store in the fridge - eat with a spoon or use as a spreadAs an icing:
Use straight away, put cupcakes in fridge to set, then remove cakes half an hour before servingAs an icecream:
Freeze... it will set hard. If you use it within a couple of hours of making, it will still scoop. For longer storage times, remove from the freezer an hour before use.As a slice:
Prepare a base, spread topping... freeze until set (one hour approx), then slice into portions and freeze each portion ready for useNut Base:
150g ground nuts (pecans or walnuts combine well with this dish)100g dates
Combine and spread on the base of a small lined dish, top with mousse
Cookie Base:
Use Coconut cookie recipe120g cookies
40g ghee
Chrush cookies and combine with ghee
Spread on the base of a small lined dish, top with mousse
Labels:
avocado,
chocolate,
chocolate mousse,
coconut,
cupcake icing,
frosting,
GAPS,
grain free,
nut free,
Paleo,
rice free,
Thermomix
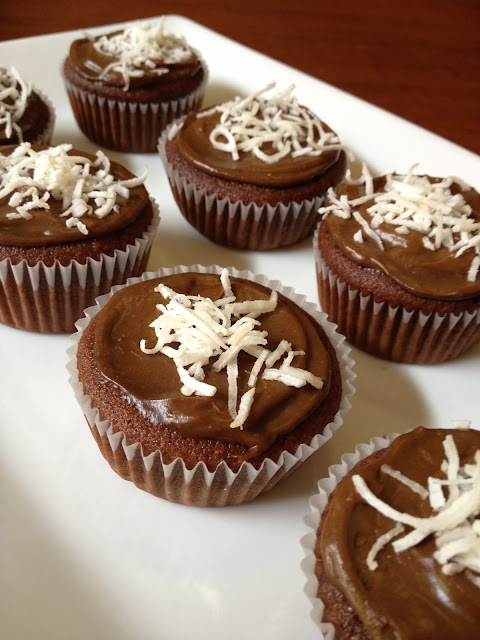
Chocolate Cupcakes
Chocolate Coconut Cakes
These taste like chocolate cakes to me, but if you don't eat a lot of coconut, they will taste like a lamington
Ingredients:
5 eggs130g honey
1/2C coconut oil
3T coconut flour
1/4C raw cacao
1/2t bicarb soda
pinch salt
Method:
Put all ingredients into your Thermomix bowl and combine 20sec speed 5Do not be alarmed that this is indeed a very runny batter... if it was normal gluten free flour it would never work, but coconut flour absorbs A LOT of liquid, so it will all be ok when baked...
Pour into patty cases (half fill)
Bake for 15 mins 180 degrees celcius until puffed and when pressed gently in the centre, they spring back
Remove from the muffin tray and cool on racks
Once cool you can ice with chocolate avocado mousse and top with coconut or just serve warm with icecream and chocolate sauce
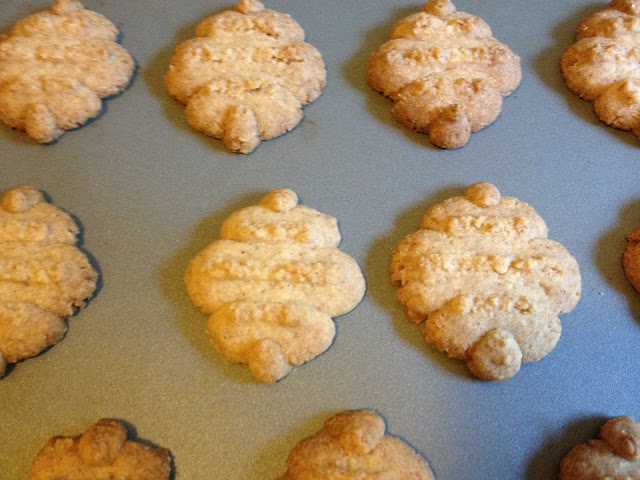
Coconut Cookies
Crunchy Cookies...
these remind me of the cookies in the big biscuit tins my parents would receive at Christmas
Ingredients:
70g ghee
30g coconut oil
55g honey
1/2 vanilla bean (seeds only)
1T dessicated coconut
1/2C tapioca starch
1/2C hulled millet
1/2C buckwheat kernals
1/4t bicarb soda
Method:
Grind millet and buckwheat in Thermomix for 130sec speed 9
Add remaining ingredients and combine 15sec speed 4
Scrape down if necessary and mix 10sec speed 4
Roll into balls and press lightly with a fork
OR use a cookie press
Bake 180 degrees for 15 minutes until lightly golden
Honey burns quickly so please check often... if you have a very hot oven, reduce temp to 160
Store in an airtight container in pantry
Pancakes
Pancakes with Fruit
Ingredients:
1/3C buckwheat kernals1/3C hulled millet
1/4C tapioca starch
1T coconut flour
1/4t bicarb soda
1C kefir (coconut or goat/cow)
1 egg
Fruit
sliced banana
sliced strawberries
blueberries
Method:
Prepare flour
Grind buckwheat and millet in Thermomix, 1 min speed 9(If you don't have a TMX, buy flours)
If you want to ferment these grains, add kefir now and leave for 6 hours (or overnight)
Prepare batter
Add other ingredients and whisk to combineStand 30 mins to thicken
Cook
Add a little ghee to the pan on medium heatPour in a small amount of batter (these work best if they are small - medium in size)
Drop in a few pieces of fruit (if desired)
Once bubbling, carefully flip
Cook a few minutes on the other side
Serve with yoghurt or maple syrup/honey
If you want to keep these Failsafe,
omit the coconut flour and do not ferment, use water instead of the kefir. Add the water slowly and stop when you have a thick batter (it should still pour but not be runny)
Labels:
buckwheat,
fermented grains,
grain free,
meals,
millet,
nut free,
pancakes,
rice free
Measurements
When doing recipes here are the abbreviations:
C = Cup
T = Tablespoon
t = teaspoon
1C = 250ml
1T = 15ml
1t = 5ml
Labels:
abbreviations,
measurements,
recipe,
Technique
Crepes
Grain free Crepes/Wraps
You can use these sweet as crepes or as wraps for savoury...
Ingredients
1/2 C buckwheat kernals1/2 C hulled millet
1 C water
2 T goat whey
1/2C tapioca starch
2 large eggs or 4 small
Method

Prepare your flour
Using your Thermomix, grind the buckwheat and millet 130 sec, speed 9(if you don't have a TMX, buy flours instead)
Put flours into a big glass bowl
Add water and whey and stir to combine
Cover with gladwrap and leave to ferment for 6 hours (or overnight)
Prepare batter
Add tapioca and eggs and whisk until you have a smooth batter
 Cook
Cook
Warm a small amount of ghee in a pan and pour on a 1/4C of batter, swirl the pan around until the batter coats the whole panCarefully flip when the edges start to come away from the pan
Cook a minute or so on the other side
Watch with care as these cook very quickly
Serve with yoghurt and honey or maple syrup for a sweet treat
Use as a wrap to make your lunch
TIP: Can be frozen, between layers of baking paper and defrosted on the bench or microwave before use.
Are you still Failsafe and want to make these? Just omit the whey and the fermenting and mix batter and use right away. The fermenting process will create amines...
Labels:
buckwheat,
crepes,
fermented grains,
grain free,
millet,
nut free,
rice free,
wraps
Meal time
What to eat?
Breakfast Lunch Dinner...
I think one of the big challenges when going grain free is working out what to eat for each meal.
Breakfast is tricky when you are accustomed to eating cereal or toast... lunch is a sandwich... dinner not so tricky as most would think meat and veg pretty normal. How do you do grain free toast and cereal for breakfast... so you go searching for nut bread recipes... when in fact the easy solution is to think of each meal as suitable for any time of the day.
Soup can be for breakfast, lunch or dinner... oh no you say... I am not having soup all the time. Unless you decide to do hard core GAPS and do Intro, I am not saying that at all. I am saying OPEN YOUR MIND lol to other possibilities. Meat balls for breakfast... my kids do it every day. At the start they were horrified (as you might be) but now if I give them some toast they ask for meat :)
You need to make yourself and your children (if they are joining your diet changes) just try it over and over... until it becomes habit.
And give yourself some variety... here are some ideas I love
- thai salmon fish cakes with spinach and avocado and a dollop of goat yoghurt
- omelette with salmon, kale, tomato and a dressing of yoghurt with garlic and dill
- scrambled eggs with avocado and kraut (pour over some broth for a soup)
- lasagne - zucchini becomes your lasagne sheets, cauliflower an amazing white sauce
- seared scallop creamy soup
- pumpkin soup with chicken, crispy kale and toasted walnuts
- creamy cauliflower soup with chicken
- zucchini noodles with broth and slow cooked lamb
- crunchy herb topped roast chicken or turkey breast
- slow cooked lamb with honeyed carrots and roast butternut squash
Be creative... think of all the things you can eat and how you might combine them. Some may work, others not so much... Soup is open for creation! Chuck in some broth, veg and meat... top with some kraut and a dollop of yoghurt... simple
My fav fast meal is roast chicken thigh (cooked in coconut oil), topped with kraut and yoghurt.
There are plenty of sweet goodies too... as you might have noticed from my failsafe recipes, I am rather fond of baking
So in these early phases of changing from failsafe to healing... think outside the square and be open to all the possibilites.
Sunday 6 January 2013
Children's Journey
My Children's Journey so far from Failsafe to healing...
My little ones have been on a low chemical diet since birth... proteins caused bleeding bowels and food chemicals caused lots of pain which in a baby means loads of crying. I maintained a very limited diet as I was breast feeding and they reacted to what I was eating through the milk. Their safe foods were lamb and rice. We eventually were able to add in chicken, potato, celery, iceberg lettuce and choko.
Their diet stayed this way until late last year when I had been having success with healing, thought I would make a start with them. I waited until they had been on their Biomedical journey for a few months. Zinc levels were very low and initially their Doctor has been working on bringing that to within normal ranges.
Coconut Oil
I started adding 20g of coconut oil to their cookies, to replace some of the Nuttelex. They initially had one cookie each a day. Once that was tolerated I increased that to two cookies a day. I now add coconut flour and have increased the coconut oil to 40g. They eat as many as they like.Once the cookies were going well, I started replacing some Nuttelex with coconut oil in their cupcakes. They initially had one coconut cupcake every few days. Now they eat a couple a day.
Meat - ghee and coconut oil
Previously I cooked in sunflower oil and always baked their meat balls and any chicken in the oven very lightly so there was no browning at all. Now I fry their meat balls and chicken sticks in Ghee on the stove. I also bake with coconut oil.Broth
They are having very small amounts of chicken broth, only cooked for 2 hours. I add 4 tablespoons to their shepherd's pie twice a week.Fermented Veg
Every few days they have half a ml of fermented veg juice. It is a strong probiotic so I am going very slowly with this.Kefir
Instead of increasing their food chemicals even more by using coconut kefir, I made some rice milk kefir. I then subsituted 50% of the rice milk in my icecream recipe, for rice kefir. They have 1-2 scoops of this daily. It has a nice tangy taste.Vegetables
I have been slowly increasing their salicylates. Initially started with some cucumber and carrot in small amounts every few days. They now have some every day. They are also having small amounts of kale and sweet potato. Will be trialling avocado this week.Fruit
This is has been tricky. Small servings create a big reaction. With the aim of increasing tolerance, I am perserving with tiny servings once a week. For example, a sliver of banana or a half a strawberry.The children have been so excited to try new foods and it has been a delight to watch their faces light up at all the new experiences.
With the aim to increase the healing foods and decrease the servings of grains, I am slowly building their chemical tolerance so that will soon be achievable. This progress has all been made in just a month of food changes.
Wednesday 2 January 2013
Goat's Yoghurt
Making homemade yoghurt (24 hour ferment)
Ingredients
1L goats milk
1/2C goats yoghurt (left over from last batch or from the shops)
1/32t starter culture
1/32t probiotic
5 drops calcium chloride
Method
Heat the milk on the stove until it is 90 degrees celcius (use a thermometer)
Once it reaches temp, turn off the stove and leave to cool until 40 degrees
(this will take a while, leave the thermometer in there and stir occasionally to check temp)
Once the temp has lowered, pour a small amount into a jug and whisk in all the other ingredients until really well combined. Now add the rest of the milk and stir well.
Pour into the yoghurt machine's inner bowl and seal, insert into the machine and set to heat for 24 hours. Leave and do not disturb.
Once the time is up, I drain some of the whey from mine, so the end result is a lovely thick yoghurt and I also have the whey to use for fermented vegetables and grains.
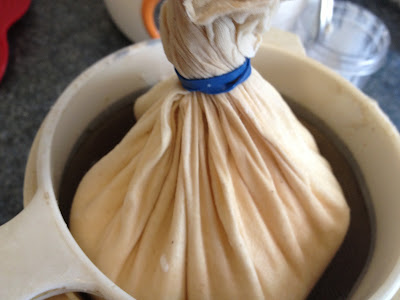
Line a strainer with cheesescloth, and pour your yoghurt in... tie the cheese cloth together with an elastic band and leave to strain... The time you leave it is personal, depending on how you like your yoghurt. I leave mine for about 45 mins to an hour (remember it will firm further in the fridge)
Now spoon the yoghurt into smaller containers for the fridge. I fill 4 small ones when strained for this length of time, and have a small jar of whey as well.
Put yoghurt in the fridge where it will continue to firm. Once cool, enjoy!
Some ideas....
SWEET YOGHURT
Add some homemade jam (fruit and honey) and stir through for a commercial style treat (strawberry is delish!)Add some honey and chopped nuts...
SAVOURY YOGHURT
A spoonful of yoghurt in soup is really yummy...For some extra flavour, add a squeeze of lemon, some chopped garlic and fresh dill, salt and pepper to taste... great in soup, on salads, meats... everywhere really!
Remember to keep a jar of yoghurt for next time... This makes a very small quantity so is suitable when you are first introducing goat's dairy and working at building tolerance, and so only consuming small amounts daily.
I bought my starter culture and probiotics from www.greenlivingaustralia.com.au
They are not really necessary once you have established your yoghurt, there should be enough good guys to get a batch going then...
(I also bought tiny spoons from them to help with the measuring)
NOTE: When you leave the yoghurt to ferment for 24 hours, it is meant to reduce the lactose and the casein, so it is more easily digested and tolerated
Subscribe to:
Posts (Atom)


